Pages

Pages

Friday, September 19, 2014

Adult T-Shirt into Baby T-Shirt DIY

Disclosure: This post may contain affiliate links. If you purchase those items through my links I earn a commission. You will not pay more when buying a product through my link. Plus, when you order through my link, it helps me stumble along in this bloggy blog world! I appreciate your support! My husband who has to put up with my craft supply obsession does too :D All opinions expressed are my own, and I am not sponsored by any product manufacturer unless otherwise stated :)

____________________________________________________


As cute and wonderful as cloth diapers are, they can be rather bulky. They can kinda make your baby look like a lightening bug. A cute as a button lightening bug, but all that fluff on the tooshy can be kinda a pain to stuff into a onesie. SO  I decided it would be easier for L to wear t-shirts when we're around the house. The only problem? Baby tshirts can be few and far between AND expensive.

Ya'll know I don't do expensive. 

I looked around the interwebs for a tutorial and all the ones I found involved sewing on ribbing for the neckline and arm holes.

I don't like working with ribbing, ya'll...

It turns out all kinds of nasty bad.

SO first I tried cutting off the existing ribbing of t shirts I had and sewing that on. NO BUENO. After staring at it in frustration for about two hours, I had a duh moment and thought to myself, 'Self, why don't you just leave the ribbing on?' 

So I took myself to the thrift store and picked up a bunch of large sized shirts with appropriately stretchy neckholes.

Ingredients:
-Tshirts (or shirts) with large sized neckholes. You want a decent amount of existing ribbing to work with
-Sewing machine
-Serger (optional but awesome)
-Scissors
-Thread
-Double needle (also optional, but also awesome)
-A onesie that fits your cute little nugget bebe :)
-Marking pen (Or a sharpie haha)

STEP 1: Lay out your shirt ON DA GROUND. Or table, if you have it. My table is covered in laundry...thus...DA GROUND.


STEP TWO: CUT OFF YOUR ARMS. No really, cut off the sleeves and SAVE THEM. Also, cut down the sides of your shirt, so you have equal front and back pieces.


STEP THE THIRD: So This is kidna hard to explain, but really simple in actuality. Cut you shirt along the top of the shoulders, making sure that you leave more ribbing on the BACK of the neckline than the front. Basically cut it a little over halfway.


This is what it should look like now. Got it? PEACHY!


STEP 4: Overlap the back of your shirt piece over the front, like so. The white dashes are how the front piece should lay under the back piece. PIN THAT. 


STEP 5: Now take your nicely fitting onesie and line up the collar with your shirt-in-progress. PIN where the shoulder seam meets the sleeve. You are going to want to sew two lines of stitching at that seam line. 


It should look about like this. But preferably better, because I kinda jacked mine up. MOVING ON.


STEP 6: Again with your onesie, fold the sleeve under (or in) and trace the arm hole of your onesie onto your big t shirt. THEN SNIPPY SNIPPY. Cut a straight line all the way down your shirt, through both layers of fabric.


You should now have this. Again, except hopefully better and more even....MOOOVVING ON.


STEP SHEVEN: Remember those sleeves I told you NOT TO THROW AWAY? Yeah, better go grab them out of the trash if you didn't listen to me. Trace a sleeve shape out along the hem line of the existing sleeve. The sleeve pattern I have here I simply drew up on a piece of paper...you can trace an old onesie sleeve to make it easier on yourself.


STEP 8: I didn't take a picture of these last few steps, because they are basic t-shirt putting-togethery-stuff. And I'm not very good at explaining that part. THIS TUTORIAL is awesome for doing foolproof sleeves! Attach the sleeves as normal, and sew up the sides of your shirt. You can serge or hem the bottom if you want, as well as embellish to your hearts content! I am currently experimenting with sleeve styles and for this one I threaded elastic through the hem casing before attaching it to the shirt.

STEP 9: Put your pretty new shirt on the cutest baby you know! 

Please ignore the spit up...this is the appreciation I get for making L new clothes hahaha


BONUS: Take some of your leftover material and make your little girl a matching headband!


These are two others I made while I was experimenting with sleeves/embellishment :)


As always guys, thank you for stopping by! Feel free to ask me anything! I love questions! :)


Thursday, July 17, 2014

Coral, Green, and Turquoise Baby Girl Nursery

Disclosure: This post may contain affiliate links. If you purchase those items through my links I earn a commission. You will not pay more when buying a product through my link. Plus, when you order through my link, it helps me stumble along in this bloggy blog world! I appreciate your support! My husband who has to put up with my craft supply obsession does too :D All opinions expressed are my own, and I am not sponsored by any product manufacturer unless otherwise stated :)

____________________________________________________

We got the nursery all put together today! So instead of lots of preface words...PICTURES.

The shelves were $0.50 a piece @ Goodwill; 'Twinkle Twinkle' painting by me; Q-tip Flowers tutorial by Homemade Ginger, made by me; Bud vase $0.25 @ thrift store; Green curtains $2 @ Walmart (clearance); White ruffled curtain, originally Target, $3 @ Dirt Cheap (my most favorite store, ever)


Crocheted blanket, made by my mother-in-law;


Round wall decor...$1 a piece placemats from Dollar Tree.


 Simple white curtain tie backs, made by me from an old curtain;


Lamp (already owned), recovered in chevron fabric by me; Double picture frame (with my husband and I as babies...he was so cute. Oh man), $2 @ Dirt Cheap; Small book shelf, $0 (found on the side of the road haha); Picture frame with ultrasound, $0.50 @ Dirt Cheap; Storage boxes, $1.50 a piece @ JoAnns;


BABEH PICTURES SQUEEE!


Mobile, $6, made by me using the t-shirt pom pom method; Framed artwork, $11, by me; Crib sheet, by me; Crib, $100 on Craigslist; Crib skirt, adjustable and made out of an old curtain, by me;


I'm so excited with how it turned out. I knew I didn't want PINK PINK PINK everywhere for her nursery, and I thought the color scheme was bright and happy. I will do more individual posts for the separate projects, but I just got so excited I went ahead and showed you all the end results haha!


Wednesday, July 16, 2014

Twinkle Nightlight Painting :: {Dollar Store Craft}

Disclosure: This post may contain affiliate links. If you purchase those items through my links I earn a commission. You will not pay more when buying a product through my link. Plus, when you order through my link, it helps me stumble along in this bloggy blog world! I appreciate your support! My husband who has to put up with my craft supply obsession does too :D All opinions expressed are my own, and I am not sponsored by any product manufacturer unless otherwise stated :)

____________________________________________________

If I had known that having a baby would open up a seemingly endless world of opportunity for completely unnecessary crafts, I would have totally insisted on having baby sooner.

Just kidding.

MAYBE.

O.O

This project only cost me $3! I found all of my supplies at the Dollar Tree or the thrift store. I did already have the basic supplies (like paint, glue, and white cardstock) on hand...so...I'm not counting those. :)

I found an unopened two-pack of 8x10 canvases at my local thrift store for $2, and a pack of dragonfly string LED lights + batteries at Dollar Tree for another $2.


These are the lights I picked up...and after this project I want to go back to the store and buy about ten more sets for miscellaneous craft usage...seriously...there are so many possibilities!


First order of business? Pluck all the plastic dragonflies off. DONE. I will probably save them in their box for years to come under the assumption that I will SURELY USE THEM FOR SOMETHING, SOMETIME, in the future. 


Next I painted my canvas to somewhat resemble a night sky. Swirly and stuff and things. I let that dry (read: I pulled out my hairdryer and blasted the poor thing because I have a patience problem. Have I told you guys about my patience problem?) 


ANNDDDD here is where I didn't take any more progress pictures because I forgot I was supposed to be documenting this process. I'M SORRY. Basically what I did at this point...


-Paint 'Twinkle Twinkle' on there with white paint in my lovely handwriting. I have bad handwriting with a pencil, so trying to do it in paint is just hilariously hit or miss.
-Punch little holes in the canvas


-Insert LEDs into said little holes and secure them with glue
-Cut out stars (hahahahaha cutting out decent star shapes. hahahaha) and attach them over the LEDs. 

For the stars, I didn't want them just glued down to the canvas, so I used some 3D foam dots to make them stand up a little.
Anndd viola! Super simple and inexpensive decor! Here it is turned off...


...and turned on...


...and turned on with the lights off!


What do you guys think?


Sunday, July 13, 2014

DIY Nursery Wall Art {On the Cheap!}


I have an...issue, you could say...with bare walls. I don't like them. They bother me. I have an obsessive need to cover the empty space with something...ANYTHING. 

Come to think of it, I basically just like cramming as much stuff possible into as little space as possible, regardless. 

UNASHAMED. 

Ahem.

The wall above my soon-to-be-here daughter's crib has been mocking me with its nakedness for the past few weeks, and I finally did something about it today, and I love it! I'm going to show you guys how to do cheap, mod-ish, wall art for your own nursery. Or kids room. Or any room! NO NUDE WALLS.

First, I simply went to Google and eugoogled (its a verb Mr S made up...it means, 'to Google') 'free nursery printables.' There are TONS of adorable printables out there that lovely bloggers have made available for you to download and print out for free! (and yes, we had spaghetti squash for dindin tonight. It was excellent. I would recommend)


After I had found the ones I wanted, (It was SO difficult to narrow them down! So many cute ones!) I saved them to a USB drive and took them to Staples to have them printed. NOTE. To save yourself even more money, you can definitely print them at home! I just happened to be very short on colored ink and wanted theses to come out bright and not streaky. Staples will also print them on heavier paper if you ask them, which adds a nice touch.


While I was out toodling about town, I went to Dollar Tree and picked up six document sized frames. 6 frames @ $1 each = $6! I almost always buy my frames there because, honestly, frames are expensive, and the cheap ones can be painted! Another idea...hit up your local thrift store...those always have frames, and lots of times you can score unique ones!


I popped the glass out and painted them white... (I wanted to spray paint them but I ran out of spray paint halfway through. Boo!)


As those were drying...I made pudding! This pudding, to be exact. If you have never eaten hot, chocolate pudding with whipped cream, you don't even know what you are missing. Go make some. Raight now. You will not regret it.


After the frames dried (and I was through carb-loading on pudding) I carefully placed the glass back in the frames and then inserted my prints. Some of the prints I cut the edges down some and backed them with white paper for a sort of faux-mat look. 


I played with the layout I wanted on the floor for a minute or two and then dragged my sexy, long-armed husband into the nursery with me to hang them :) 

What do you think? I'm sorry about the glare, the light was being VASTLY uncooperative and unsympathetic to my photographing plight.


Again, thank you light...


I think my favorites (apart from all of them, that is) are the feathers and the 'L is for Laurel' one. You can customize that one with your own letter, name, and color! They add such a nice personal touch to the room, I think!


All told this project only cost me around $11! Like I said, it would have been cheaper if I had printed my pictures at home, but I was *very* pleased with how Staples did. I can't wait to show you guys the nursery all put together!

Printables Sources:

Definitely check out those links! So. Much. Cuteness. Oh man.


Friday, July 11, 2014

Thrifted TV Cabinet to Nursery Armoire :: {Before & After}

Disclosure: This post may contain affiliate links. If you purchase those items through my links I will earn a commission. You will not pay more when buying a product through my link. Plus, when you order through my link, it helps me stumble along in this bloggy blog world! I appreciate your support! :D
____________________________________________________


You probably don't know this, but my (well, OUR) greatest crafting achievement is due in less than a month!


From what they tell us, 'it' is actually a 'she'! I don't know if Mr. S and I could be any more excited. Oh. Man. ALL THE EXCITEMENT. The best reason in the world to get all sick and swollen and eat your weight in Sonic ice. Mmmm. Sonic ice. :)

Do you know what ELSE is exciting about this??

GETTINGTODOTHENURSERYOFCOURSE!


I will definitely be updating you guys with current (ish) nursery pictures as I finish things. Right now it is in massive amounts of disarray...so...no pictures of it for right now... ;)

*awkwardtransitionintothepointofthispost*

So this was the very first project I did for the nursery, and I actually started it back in...March? Yes, March. Goodness. I'm behind. ANYWAY. Mr. S and I were out one day at a used furniture store and we came across this bad boy. It was a old Broyhill TV cabinet and I fell in love with the front detail...lattice...stuff.


I loved that it had drawers inside, since the closets in our house are few and far between and also tiny. We talked the owner into giving it to us for half off due to some extensive cosmetic damage (pictures below) and scored it for less than $30! Yay!

(I would also like to take this time to give credit to my amazing husband, who, despite my loud and most likely whiny and obnoxious protests that went something like... 'NOOO IT WONT FIT IN YOUR CAR LET'S JUST PAY THEM TO DELIVER IT NOOO NOOO WHAT IF WE GET PULLED OVER WHAT IF IT FALLS OUT WHAT IF THE WORLD ENDS NOOO.' managed to fit this monstrosity into his ever so adorable VW Rabbit hatchback.)


(Isn't he handsome? Ahh. :) He told me I needed to trust him, especially after the fact he fit our washing machine and then our dryer in that hatchback also. I am such a pessimist haha)

Like I was saying, this piece was fairly beat up...not just scratches, I'm talking massive chunks of veneer missing and deep gouges and veneer peeling off. To name a few. And the back was missing. I don't know what this poor dear was in its previous life, but I'm wondering if it didn't just get thrown down some stairs for kicks and giggles. It needed some serious loving.

The bottom leg on the left side was the worst...it had a good inch chunk taken out, on top of the veneer being warped beyond reason.


The other leg was pretty jacked up also.


Andddd there were these lovely veneer chunks missing all over the place. The clamps were there in an attempt to at least flatten out the veneer somewhat.


There were deep scuffs like these E'ERWHERE. 


What does one do when their veneer is so messed up? BONDO BABY. Bondo is actually used as body filler for cars, but it works MAGICALLY for these type of projects. I found mine at Lowe's. 


Again, my amazing husband stepped in here and protected our unborn child from noxious fumes by doing all the harsh chemical applications for me..because...seriously folks, this stuff is ranky. Do  NOT do this inside, or any other poorly ventilated space, kay? Kay. I care about your brain cells. :) I would like to say here that I don't 'delegate' tasks involving my projects very well, and while Mr. S was working on this part I stood with my face pressed up against the glass door shouting helpful tips like 'MAYBE A LITTLE MORE OVER THERE? NO. OTHER OVER THERE. ITS UNEVEN' and gesturing wildly. I'm sure he loved it.

So after the Bondo we did some fun sanding! Sanding the front part was a bit of a pain, but it worked out. I also got some heavy duty wood glue and glued/clamped the pulled up veneer piece the best I could.


After sanding came my most favorite part...PAINTING. I love painting because that is when I finally start to see my 'vision' for these projects start to solidify. It gives me such grand warm fuzzies. What was awesome about this is the paint was a jar of 'Oops Paint' from Lowes...I picked up the whole gallon for $5! What was ALSO awesome about this paint color, was that Lowe's had the exact same shade in spray paint, which I used for the front panels, because getting in between all of those decorative moldings was taking FO EVAH.


SHEEN SHEEN. Yay!


After the paint dried (which only took about...oh, 45 seconds thanks to the 98 degree weather in southern Georgia haha!) I tried to figure out what I wanted to do with the front. I knew I didn't want to leave it bare...that was way too much unbroken lettuce green, even for my tastes. SO then came my favorite part of every project...JORDAN HAS TO DECIDE ON A PATTERN.

Oh patterns. Why art thou so great in number and diversity?

I went to my most totes fave store, Joann's, and wandered around for close to an hour and eventually left with an armful of sample fabric and some rad scrapbook paper. And because I like to be able to actually lay my eyeballs on things, I did each little quarter panel with the four choices I narrowed it down to. (which was a Herculean feat in and of itself)

Option #1...This was the first one. I *loved* this fabric so so so so so so much, and honestly almost went with it.


Option #2 was this awesome scrapbook paper I found, which I also really really really liked. GAH DECISIONS ARE SO HARD.


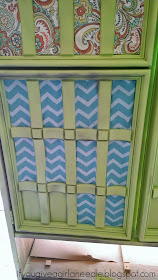
Option #3...of course I had to at least try a chevron...


And Option #4. I think the brightness sold me on this last one. I knew I wanted a feminine nursery that wasn't PINK PINK PINK EVERYWHERE PINK COTTON CANDY PINK DIE FROM THE PINK but I didn't mind having some interspersed here and there. I also like that the pink in this was more of a coral color.


 You guys want to see my mad photo shop skillz? Yeah. So I did this bad boy up in Microsoft Paint in an attempt to see what the finished project would looked like. Hahahahaha. Sooo fantastic.


After I had decided on the fabric, I told myself I'd just unscrew the molding and lay a whole piece of the fabric down under it and screw the molding back on top. Easy, right? NO DICE. I couldn't for the life of me get that molding off. Some witchcraft must have been involved or something, because that stuff was not going ANYWHERE. So I got to do it the second way...cutting up tiny rectangles and attaching them individually. Yay for the fun way!  

It actually was not as bad as I make it sound. I measured and cut up 48 little fabric pieces and drowned them in mod podge, carefully placed them in their own little individual hole and carefully squeegeed them in. And let dry. GETTING SO CLOSE.


I also made a back piece for the inside, which was covered with the same fabric. See how much happier it is when you open it now? :D


Then I lined the inside of the drawers with pretty contact paper...which I can't for the life of me remember where I got it. I've used this stuff so many different places in our house! (Sorry about the quality of this picture...it was a la Jordan's cellphone because she forgot she hadn't taken one yet. And all of the drawer bottoms have been since filled with baby things, which are ever so classily pushed to the side here ;))


I didn't like the original clunky hardware that had come on the bottom drawer at ALL, so I filled in the holes with wood putty and replaced the single pull with two smaller (and cuter!!) ones.


OH and I thought I would show you guys what that leg looked like before and after the bondo, sanding and paint! Spiffy, right? Its not perfect but I was pleased with how it turned out for our first time using it.

ANNNDD FINISHED. And in the baby's room filled and covered with baby things I need to sort...sometime veryvery soon! I really like this piece, I think it adds such a fun element to our daughter's room! I can't wait to show you guys the rest of the nursery!


Cost Breakdown:
Armoire = $30
Paint = $5
Fabric = $10 (Joann's coupon, baby!)
Bondo = $5 (we have loads leftover from the can)
Wood putty & glue = $0 (already on hand)'
Total = ~$50


As always, thank you for reading!