Thursday, January 2, 2014

DIY Magnetic Poetry


I have an unnatural fondness for small, random things. And refrigerator magnets. And words. So when I came across the Magnetic Poetry Kit in a little downtown gift shop I reallyreallyreallyREALLY thought I needed it. NEEDED IT. They had one of the kits on display on a metal board and I stood in the store for a good 30 minutes shuffling the words around.


However, $15 seemed kinda steep to pay for a bunch of word magnets, and they didn't look that hard to make. So LET US MAKE OUR OWN.


DIY Word Magnets

:: Adhesive Magnetic Sheets 
{These are large flat magnets that have a peel-y sticky side. I got mine at Walmart}


:: Microsoft Word or other computer word processor program

:: Printer

:: Magazines

:: X-Acto knife

:: Scissors

ONWARD.

STEP UNO : Your first task shalt be to open your word processor on your computer; Microsoft Word, Notepad, so forth. 

STEP SECOND : FUN TIME PART! Type random words! Seriously. Just go crazy and type whatever words come to mind. If you need some help with words, check out this website that generates random words, or this blog post that has several great examples of some standard words. I just started by typing random sentences. Note the 'Taco Bell'. Taco Bell plays a very important role in my life. WatcanIsay.


STEP TREE : Print out your words using your handy dandy printer.

OR DON'T BECAUSE YOUR PRINTER IS MALFUNCTIONAL.
SO since my printer pooped out on me, I decided to go the magazine route instead. Whichever you decide, the remaining steps are the same. 

STEP SECOND (again) : Grab yourself a magazine or four!


and your X-acto knife!


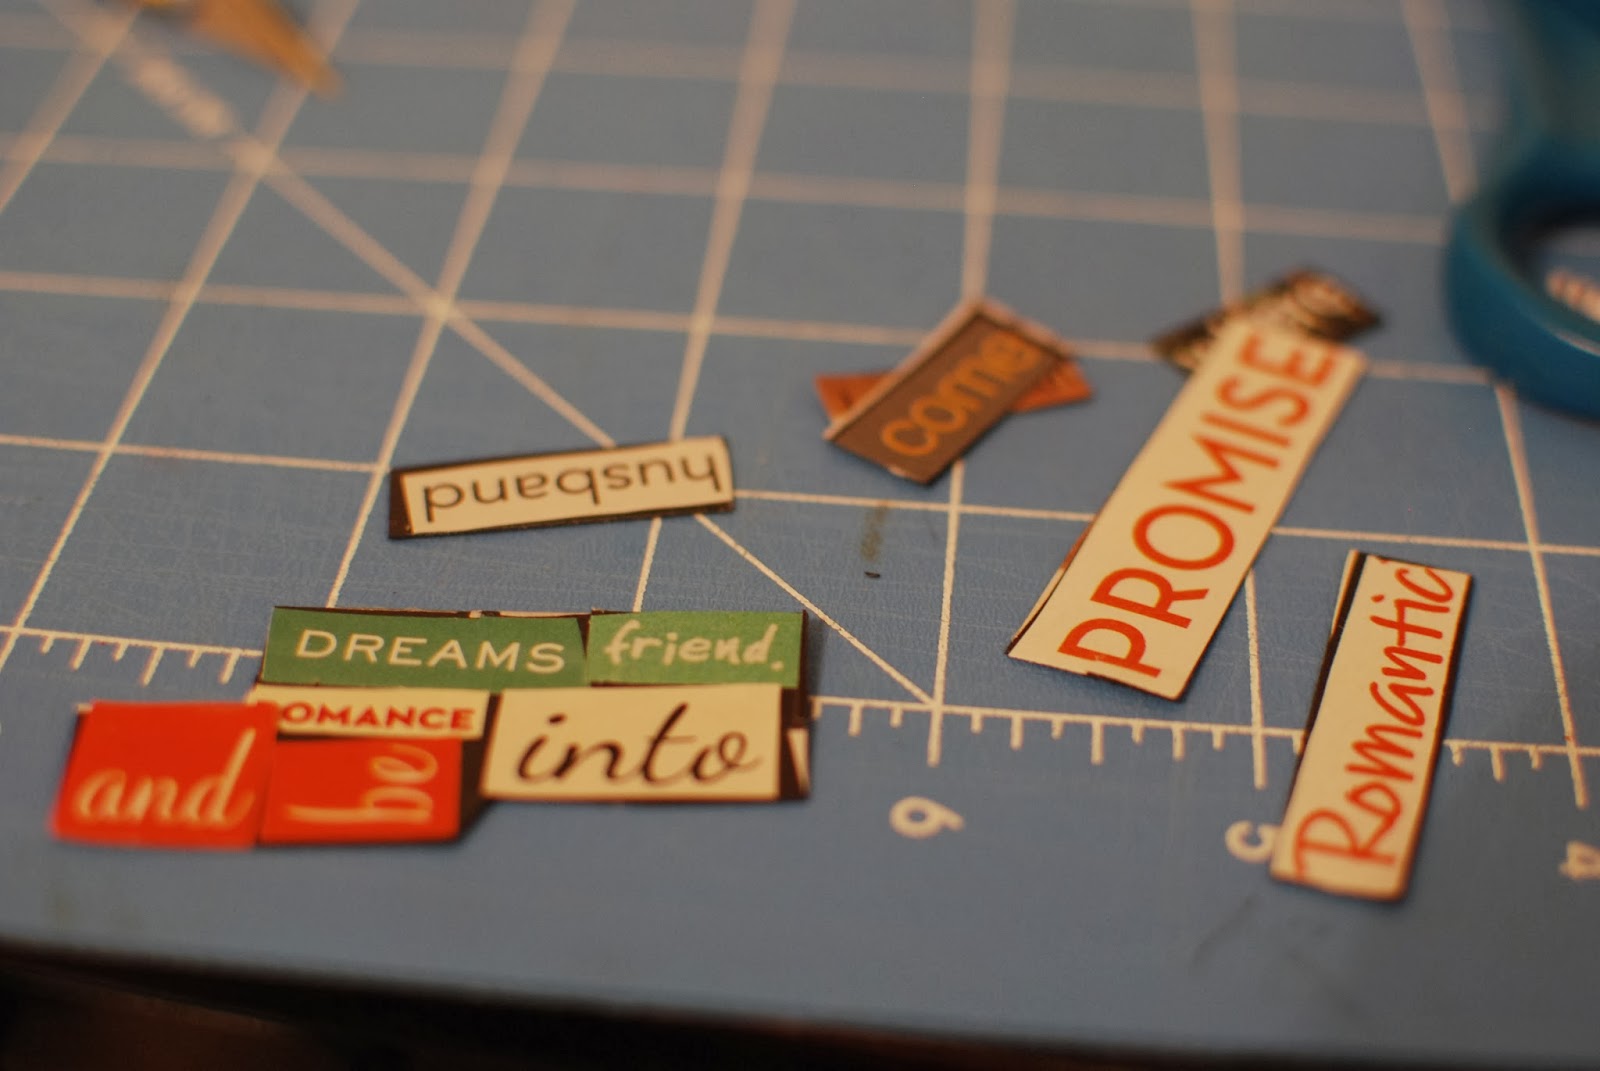
STEP THREE (again) : Go through your magazines and cut out words that strike your fancy! ALL THE WORDS. Anything. The more random the better. Don't forget to cut out the basic filler words also, like 'it' and 'the' and 'is' and 'shrubbery'.


STEP FOURTH : Take your magnetic sheet and gently peel the paper backing off of a small portion. I like to peel the paper as I go so I don't get lots of dusty dirty particles thingies on the remaining sticky part.


STEP FIVE : Take your cut out words and place them face up on the sticky part of your magnet. If you printed off your words from the computer, cut the excess edges off of your piece of paper and place it on the sticky side of your magnet.

 
STEP SICKS : Cut out your words, trimming the excess magnet pieces down.


STEP SEVEN : After you have trimmed up your words, you're done! Slap them proudly on your refridgerator or throw them into an old Altoid tin and give them as a present to that handsome someone in your life :)


This is a great project for a rainy day, and the awesome thing is, you can add to your word collection whenever you want to!

AWESOMESAUSAGE.

Wednesday, January 1, 2014

Steam Mop Pads from Towels (Quick and Easy Tutorial)

Hi everybody! I bet you're wondering where in doodleflop I've been for the past 8 months. And that is an rather droll story that involves lots of doctors and hospitals; very tedious, super boring. BUT. I have returned and bring you this super simple tutorial for making your own steam mop pads...yay!

The majority of our house is floored with tile, so my wonderful husband picked me up the Swiffer/Bissell Steam Boost a few weeks ago. {You can find it here}

I just now got around to using it and I must say I was very pleased with it. I also really liked the pads it came with...they smelled nice and cleaned well. However, the replacements are about $9 for 20, and over time it adds up. SO I decided to make my own washable ones! Its really easy, even for a beginning seamstress! And what was awesome, I already had everything I needed on hand...and you probably do to!


Steam Mop Pads from Towels :: Tutorial

You shall need...

:: A regular old wash cloth 
{You probably have an old one laying around somewhere OR you can swing by your local thrift store and pick some up for super cheap. ALSO. If your steam mop is on the bigger side, you might want to use a hand towel instead of a wash cloth}


:: Velcro
{I used the thinner size shown on the right. It might be 1/2 inch? I would shoot for no smaller than 1/2 inch just to make sure it stays all nice and fastened and the like}


 ALSO:

:: A sewing machine

:: Thread

:: Scissors

:: Pins

ONWARD!

STEP UNO : Lay out your wash cloth on the ground, and center your steam mop on it so the extra towel fabric is distributed evenly on both sides. Depending on which steam mop you have, you might have to use a hand towel instead.


STEP THE SECOND : Fold your towel over so it is giving your mop and nice warm towel hug.


CUDDLY!

STEP THREE : {I completely didn't take a picture of the interactive part of this step you guys...I'm so sorry! I blame the pregnancy hormones!} So I kinda just eye balled this part, but, you are going to want to mark with pins where your velcro is going to go. HOW VAGUE IS THAT? Does this picture help at all??


You guys see what's happening here? You want to put one piece of velcro in each corner basically, so when it folds around your mop, it can fasten. I left one side of the velcro intentionally long so I can adjust and stuff and things.

Here is one side...with the small pieces of the scratchy velcro...


And here is the other side with the long pieces of soft velcro...


STEP FOURTH : Once you have pinned on your velcro, try it on your mop to make sure it will fit and fasten on nice and snug. Adjust accordingly.


STEP FIVE : Once you've got everything nice and where you want it...SEW THAT VELCRO ON, YO.


TIDY!


STEP THE LAST : Put that puppy on your steam mop and mop with joy knowing you are saving yourself money and things! When it gets dirty...just throw it in the wash!


I've used mine a few times and it works awesome!

OPTIONS AND THINGS.

To get a nice deep cleany clean, I'd definitely recommend using some sort of homemade floor cleaner with these. There are a ton of options lurking around Pinterest and the interwebz!
{Check some of those out here}

If you are looking for more absorbency, you can definitely add another towel layer; just sew them together first.

These can be made with microfiber cloths, which are nice and absorby also!

AWESOMESAUSAGE!

Related Posts Plugin for WordPress, Blogger...